How To Enable PHP Error Logging
PHP Error logging is a useful way of finding and troubleshooting errors that exist on your site. Enabling it involves 2 things:
A) Create a file called php_error.log inside the public_html folder (or the root folder for addon/sub domains)
B) Add this code to the .htaccess file (make sure to replace CPANELUSERNAME with your cPanel username):
php_flag  log_errors on
php_value error_log  /home/CPANELUSERNAME/public_html/php_error.log
Here is the full step by step guide to do this in cPanel:
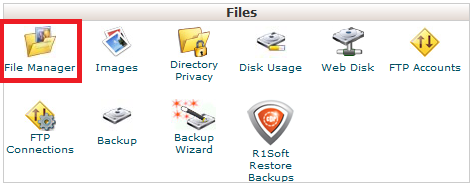
Step 1 - Log in to cPanel (click here for a guide) and click on the File Manager icon

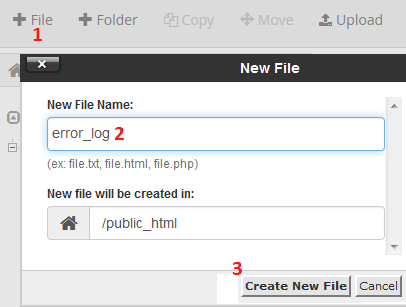
Step 2 - Make sure you're in the public_html folder (or the relavent root folder if doing this for an addon or subdomain). Now (1) Click on +File (2) type error_log as the new file name then (3) hit Create New File

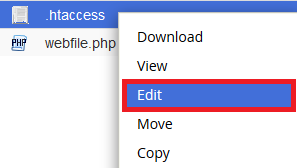
Step 3 - The public_html folder should have a .htaccess file in it. Right click (or command+click in Mac) on it and select Edit.

If you can't see the .htaccess file: you may have to show hidden files first. Click here for a guide on doing that. If the file still isn't showing, just create it like you created the php_error_log file
Step 4 - Type the following code into the top lines of the .htaccess file (if there's other code there, just move it down a few lines)
php_flag log_errors On
php_value error_log /home/CPANELUSERNAME/public_html/error_log
Be sure to replace CPANELUSERNAME with your cPanel account's username. It should look something this:

Hit Save Changes in the top right once that's finished then click Close to close that file.
![]()
You're done!
To view the file: either open it in the file manager by double clicking on it, or go to the URL, eg: http://yourdomain.net.au/error_log Note that there can be a delay of 2-3min between when a PHP error occures and when it's visible in the log file.