How to Set Up Mailchimp DNS in cPanel
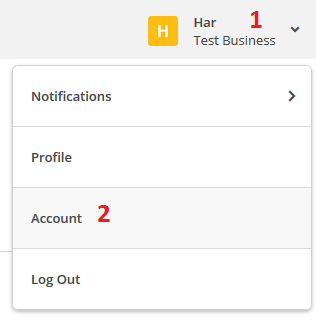
Step 1 - Log in to Mailchimp: https://login.mailchimp.com/ then click on your name up the top, then Account
Step 2 - Click on Settings > Verified Domains

Step 3 - Click on the View setup instructions link

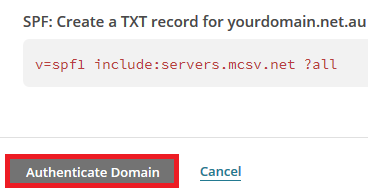
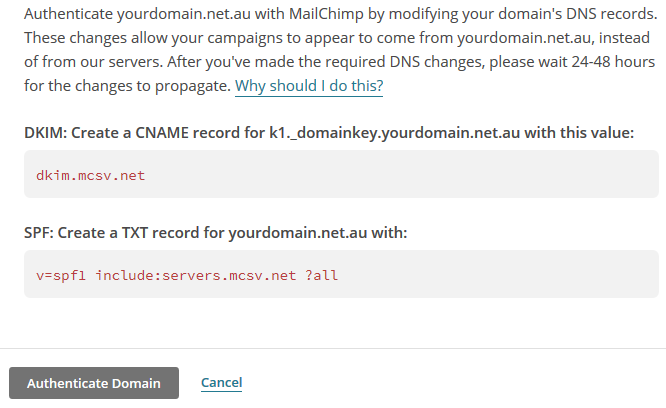
You will see a window that looks something like this:
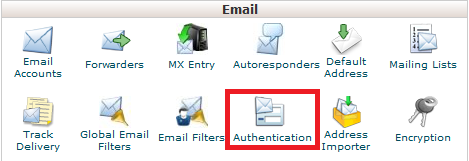
Step 4 - Keep that window open, then open another window and log in to cPanel (click here for a guide)and Click on the Authentication icon
Step 5 - Click on the Enable button under SPF. If your SPF was already enabled that's fine :)
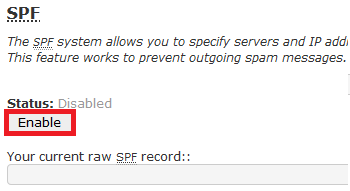
Your screen should now look like this:
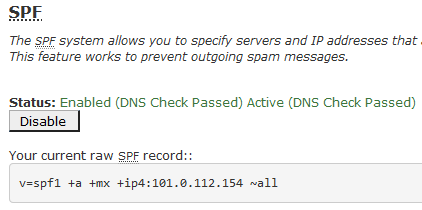
Note that the "current raw SPF record" may have slightly different code to what's in the above picture.
Step 6 - Go back to the Mailchimp window and find the SPF record
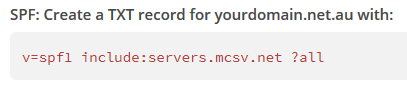
Now Go back into cPanel and add the main portion of the record under the Includes section and add the record
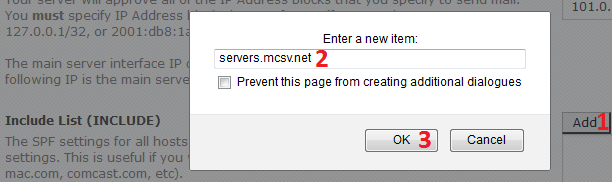
Then hit Save down the bottom
![]()
Step 7 - Now click on the Home button in the top left to go back to the main cPanel screen

Now click on the icon for the Advanced Zone Editor (or DNS Zone Editor)
Step 8 - Go into Mailchimp and take note of the DKIM records

Now go back into the cPanel Zone Editor and click on Manage for the domain you're setting up Mailchimp for
Click Add Record then select Add CNAME Record
Step 9 - Add the record similarly to what the picture bellow looks like, and click Add Record
Now go back into Mail Chimp. Note that the record can take up to 4hrs to propagate. Wait a little while and click Authenticate Domain every so often. Once the authentication is successful, you will be done :)