Office 365 DNS Records
If you purchase Office 365, you will need to add these records before emails will work correctly.
List of records
Verification record
This record will be unique to your Office 365 account. It will look similar to the following:
When you add the record, it will look like this:
Exchange and Exchange Online Protection
These three records are required for Office 365 emails to function.
| Name |
TTL |
Type |
Record |
| autodiscover.yourdomain.net.au |
3600 |
CNAME |
autodiscover.outlook.com |
| yourdomain.net.au |
3600 |
TXT |
v=spf1 include:spf.protection.outlook.com -all |
| yourdomain.net.au |
3600 |
MX |
Priority = 0 yourdomain-net-au.mail.protection.outlook.com |
Microsoft Teams and Skype for Business (Optional)
| Name |
TTL |
Type |
Record |
| sip.yourdomain.net.au |
3600 |
CNAME |
sipdir.online.lync.com |
| lyncdiscover.yourdomain.net.au |
3600 |
CNAME |
webdir.online.lync.com |
| Name |
TTL |
Type |
Priority |
Weight |
Port |
Record |
| _sip._tls.yourdomain.net.au |
3600 |
SRV |
100 |
1 |
443 |
sipdir.online.lync.com |
| _sipfederationtls._tcp.yourdomain.net.au |
3600 |
SRV |
100 |
1 |
5061 |
sipfed.online.lync.com |
Intune and Mobile Device Management for Office 365 (Optional)
| Name |
TTL |
Type |
Record |
| enterpriseregistration.yourdomain.net.au |
3600 |
CNAME |
enterpriseregistration.windows.net |
| enterpriseenrollment.yourdomain.net.au |
3600 |
CNAME |
enterpriseenrollment.manage.microsoft.com |
How to Add records in cPanel
Step 1 - Log into cPanel and click on the Zone Editor icon.

Step 2 - Add the required DNS records using this guide. You may be asked if you would like to add other records - you can do so if you wish, but the below three are all that are needed for emails to function.

Note: While you're adding these records, you may find that the Autodiscover record already exists. If so, follow Step 3 below. Otherwise, proceed to Step 4.
Step 3 - (Optional) (1) Search for 'autodiscover' then (2) click Edit.
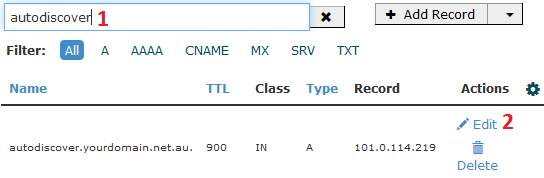
(1) Change the Type to CNAME, (2) set the Record to autodiscover.outlook.com then (3) click Save Record.

Step 4 - (1) Click on the MX icon, then (2) delete any MX records other than the Outlook one you added.

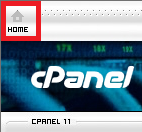
Step 5 - Click on the Home Button in the top left.
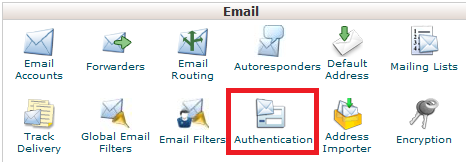
Step 6 - Click on the Authentication or Email Deliverability icon (This depends on the cPanel version, as seen here).
Step 7 - Make sure that SPF is Enabled:

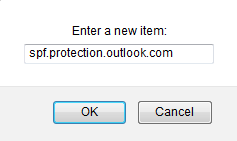
Find the Include section and click on Add.

Type in spf.protection.outlook.com and click OK.
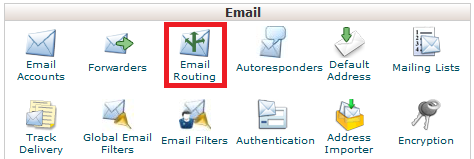
Step 8 - Click on the Home icon in the top left.
Step 9 - Click on the Email Routing icon.
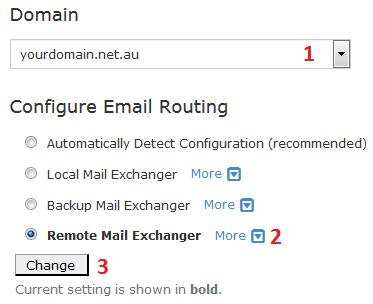
Step 10 - (1) Select the domain (2) Click Remote Mail Exchanger then (3) click Change.
Share via


