Super Cache is a plugin for WordPress that speeds up your website, often making a night and day difference. To explain how it works, WordPress uses many little programs (called PHP scripts) to generate each page of your site. This happens every time a user visits any page. What Super Cache does is save each page into a normal HTML text document, so after a page has been visited once, Super Cache will tell WordPress what that page looks like, meaning all those PHP scripts don't have to run a second time to generate the same page for a different user.
Before you start, make sure that WordPress and all themes/plugins are updated (click here for a guide). Also, make sure that you have PHP updated to 5.6 or 7 (click here for a guide). PHP7 is preferred but some plugins and themes only run properly under 5.6 so if you notice any errors just go back to 5.6
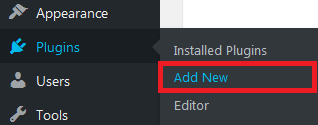
Step 1 - Log into WordPress then click on Plugins > Add New
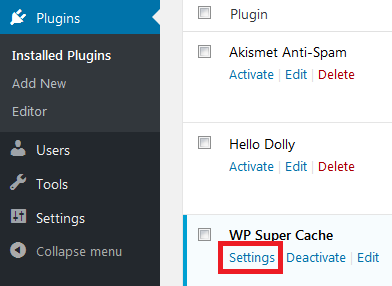
Step 2 - Find and install the WP Super Cache plugin

Make sure to click Activate once the install is complete

Step 3 - Click on Settings for the plugin
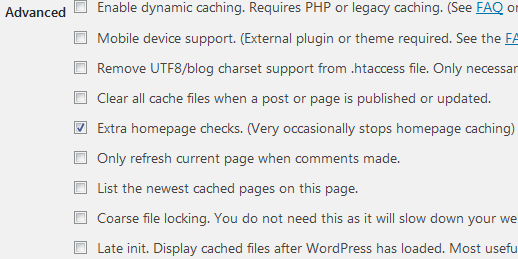
Now click on Advanced and make sure the following settings are used:
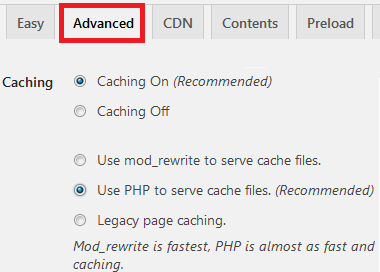
Make sure to click Update Status once you're done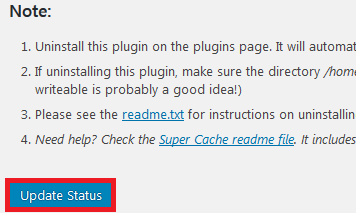
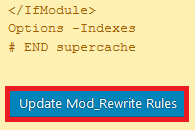
Then scroll down and click Update Mod_Rewrite Rules
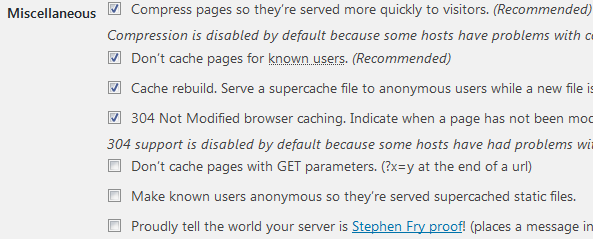
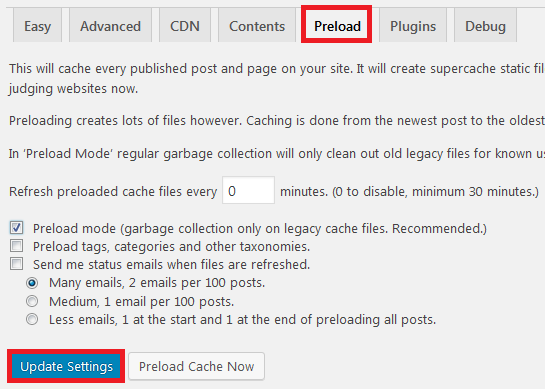
Step 4 - Click on Preload > set the options as per the image bellow > click on Update Settings
Congratulations! You now have WP Super Cache installed and configured on your hosting account. If you still experience speed issues with your website click here to check our WordPress speed up guide.